

Check back soon
Once posts are published, you’ll see them here.

What happens when you start watching YouTube videos of junk journals? You decide you want to make your own inserts and decorate them. I watched several videos and after attempting to stain and dry them in the oven (almost burning down the house), I moved the setup outside to my patio. I figured why not dry the pages outside since California is almost always sunny and dry.
You will need:
1. Paper for staining, different types. Copy paper, Diaso craft paper, old atlas pages, book pages, paper doilies, lace, etc.
2. Dipping receptacle: A shallow baking sheet or pan with sides for dipping the paper so something your paper will fit in. A 13 x 9" pan will work, too. The pan will stain so pick out a pan that you can keep just for staining or that you don't mind being stained.
3. Three or four plastic table cloths from the Dollar Tree, one to cover your table and one on the drying surface to start with. I laid mine on the patio cement held down with rocks so they wouldn't blow away. In California the stained paper dried fast so I had to keep an eye on them so they wouldn't blow all over the backyard. Yes, crude, but I didn't like doing it in the oven and burning the house down, remember?
Lets get started:
Step 1: Setup your work surfaces. Cover the table and setup your drying area with the plastic table cloths.
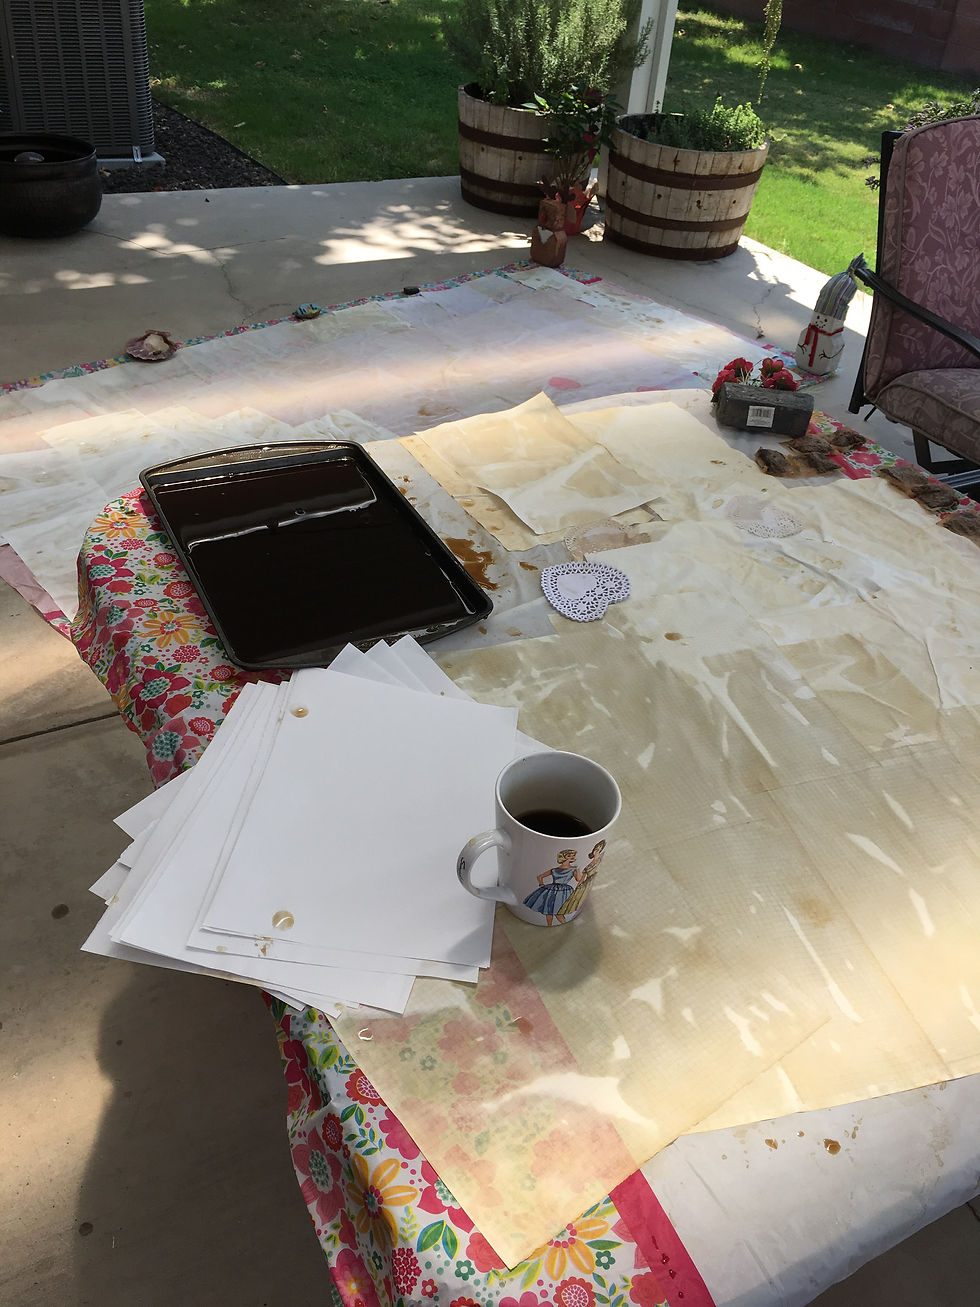
Step 2: Gather up the paper you want to tea stain and set aside.
Step 3: Boil 4 cups of water and add a plethora (about 10) black tea bags. Let this steep for about 5 minutes. If you want lighter pages, take the bags out sooner and for darker pages leave the tea bags for about 10 minutes. After the tea is steeped, remove the bags and set aside. Lastly, add about 1 teaspoon of baking soda to the tea slurry and stir. This reduces the acidity of the tea so the paper is "acid-free".
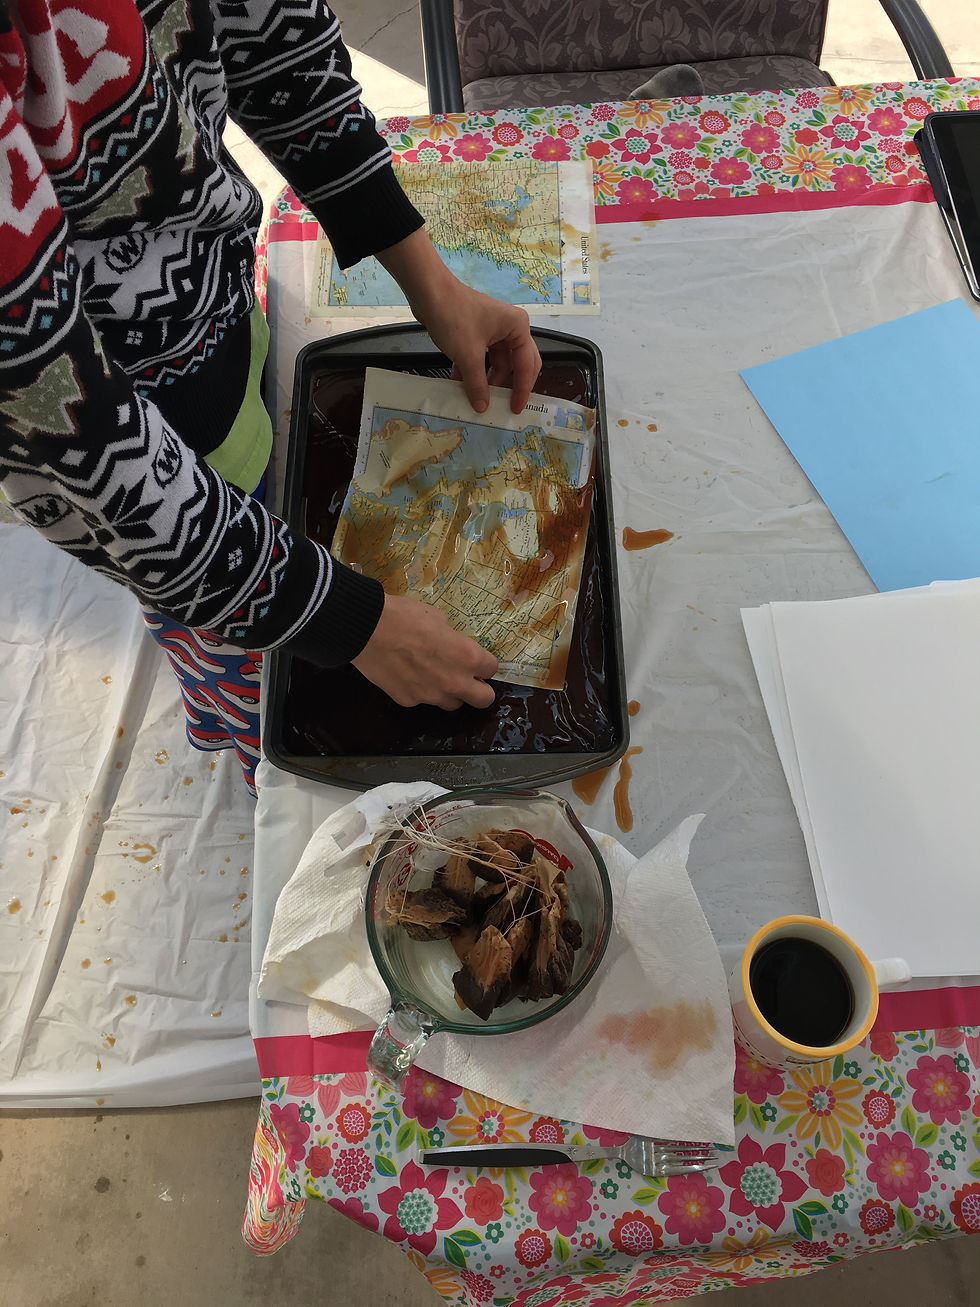
Step 4: Pour the tea in the dipping pan.
Step 5: Start placing one sheet at a time in the tea and submerge then set out to dry on the table cloths. I don't let mine sit because the paper gets weak and will tear. The paper may not look dark when you pull it out but after it dries, it will darken.
Step 6: When the pages are almost dry, they will lift off of the plastic tablecloths and I put them in bunches using heavy paper clips as seen below and hang them to dry on the strands of lights I have strung on my patio.


Step 7: Iron the paper. (Optional) I want the paper to lay flat.
Using an old wood cutting board and my iron, set the iron to warm, lay the paper on the board and make a couple swipes across the paper to iron out the wrinkles. Voila! You are ready to cut and make your own inserts.


Paper ironed and ready to cut for journal pages.
コメント